.......................................
7. Computational Couture#
This week I finaly got a peak of computaional design. Parametric designing with Grasshopper is one of my favorite topics that I couldn’t wait to get introduced to. As I had 0 knowledge on Grasshopper and very minor of Rhino, I knew this would be a big challenge to learn, practice on a fully new software as well as learning about step 2 : 3D print.
Grasshopper and Rhino#
Inspiration#
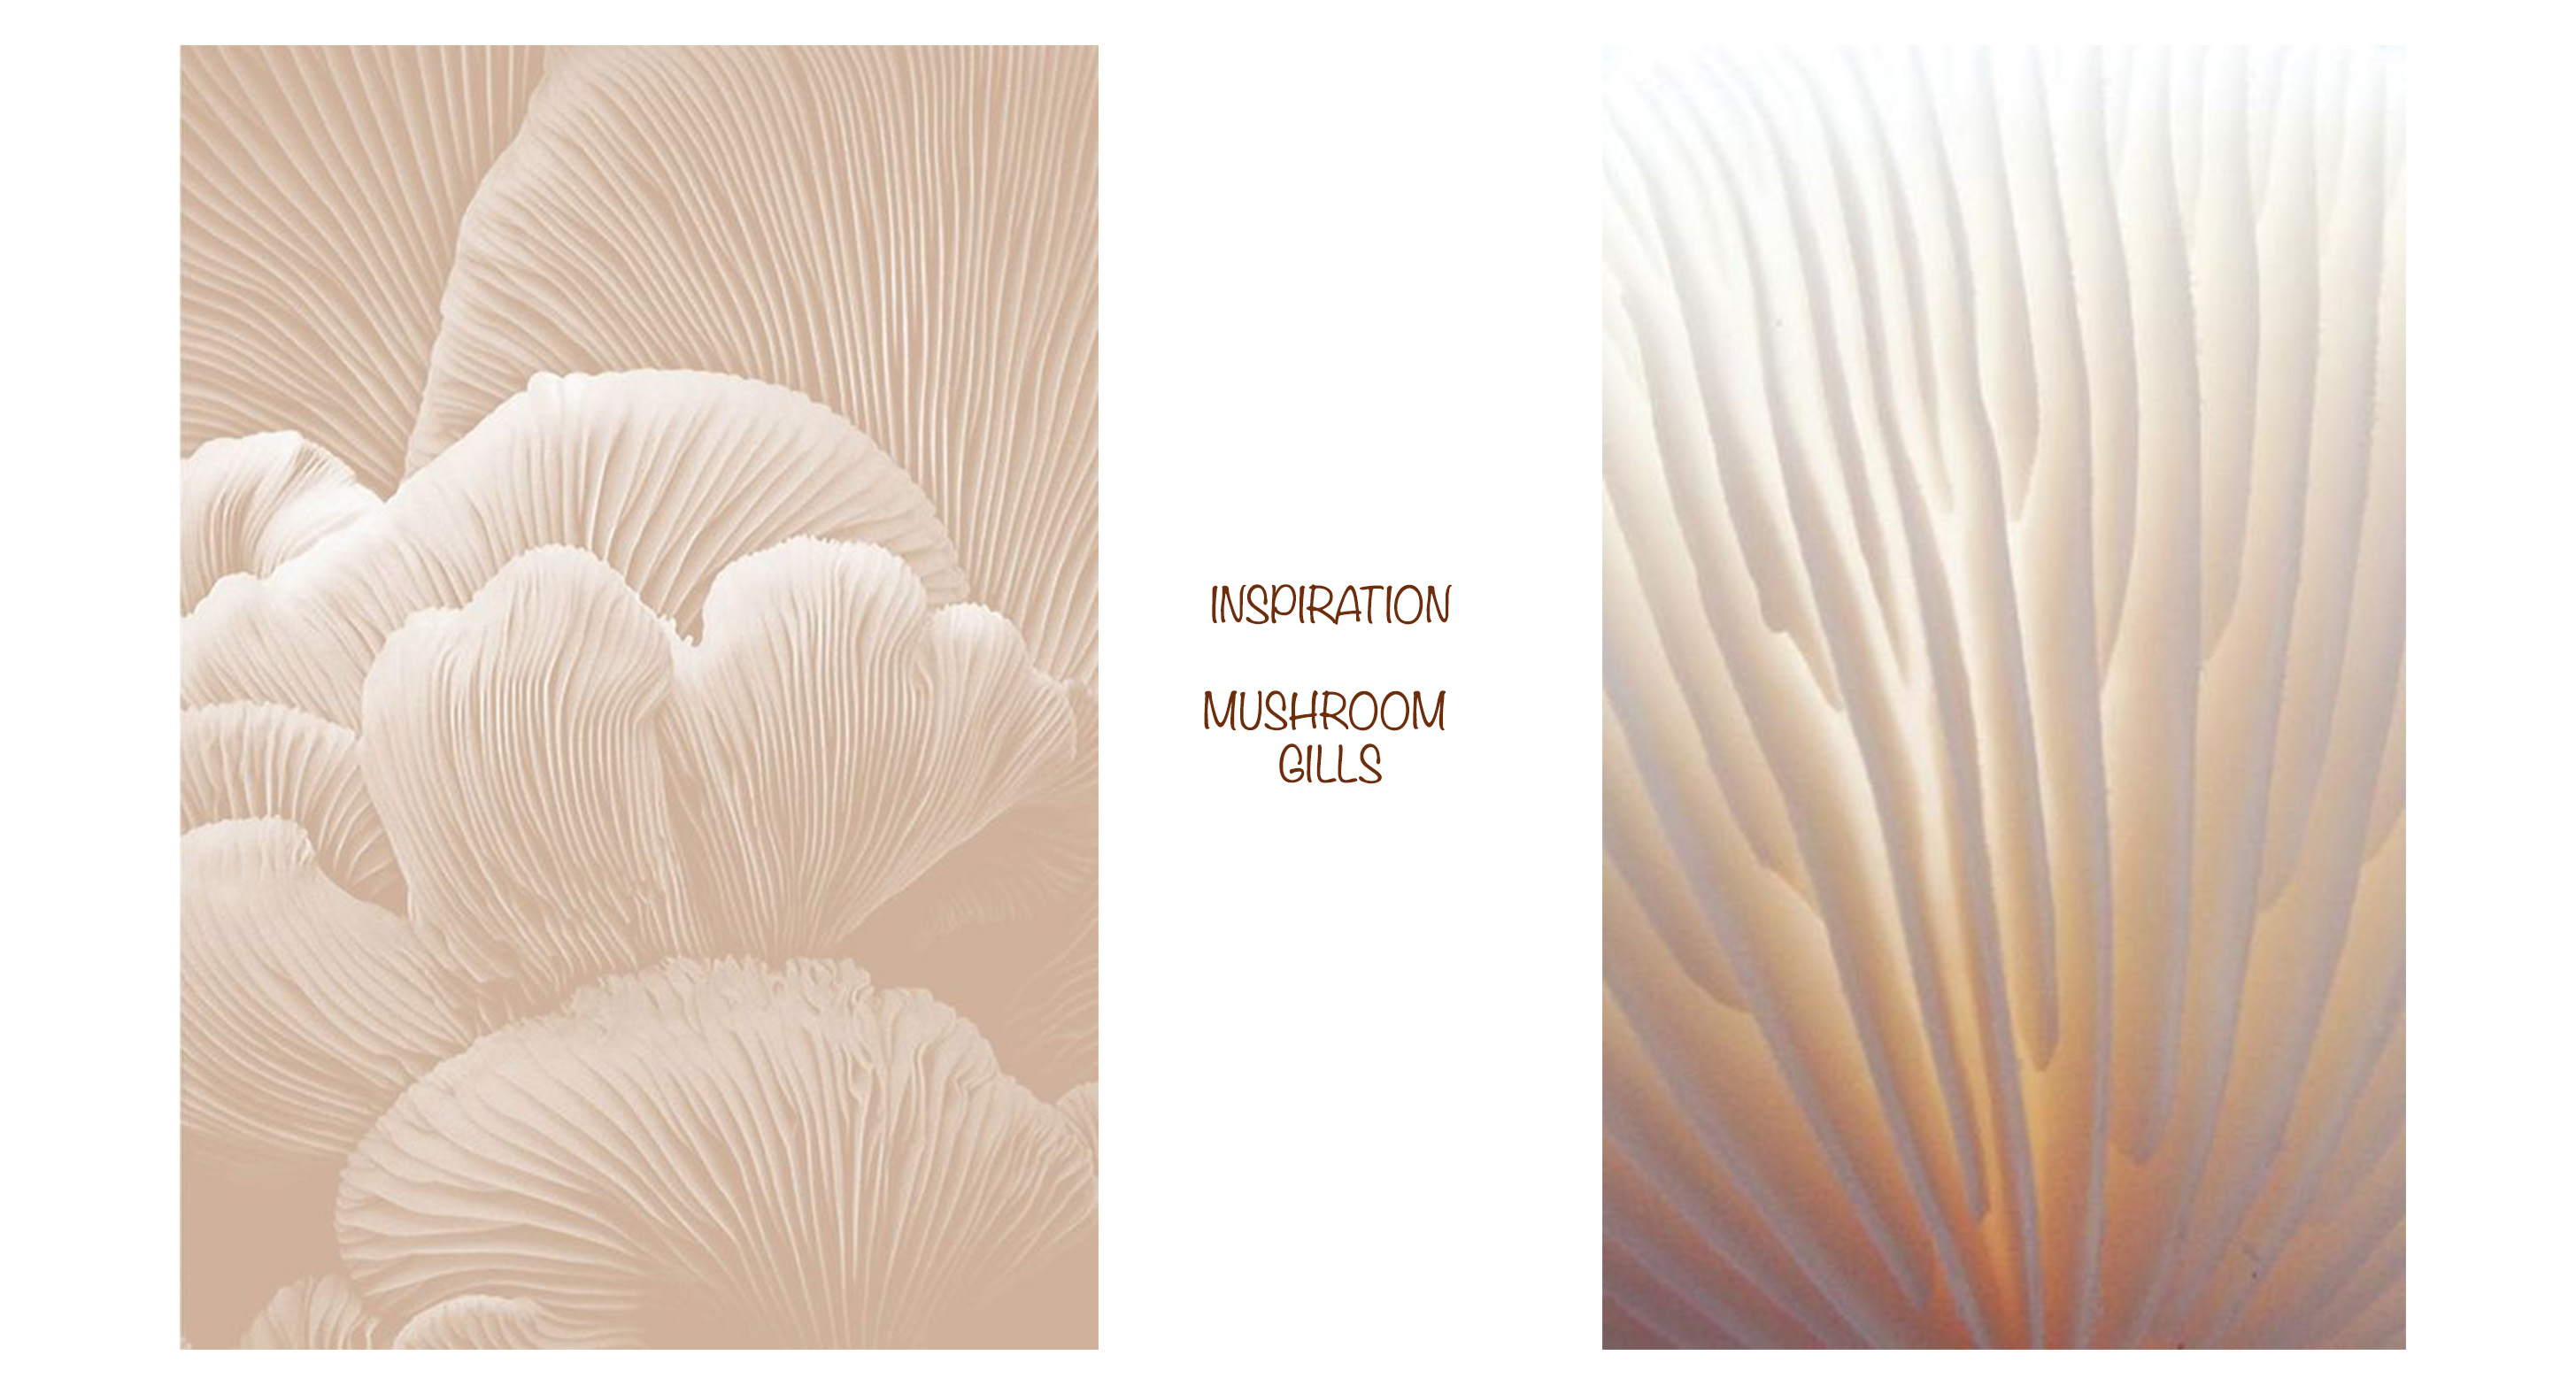
I thought of maybe starting with mimicing the gills of mushrooms, that I imagined to be a non-too complexe design for the amount of time I had, and so I started with checking the parametric design tutorials on Youtube. I came across this one that was quite similar to the basic design of those gills.
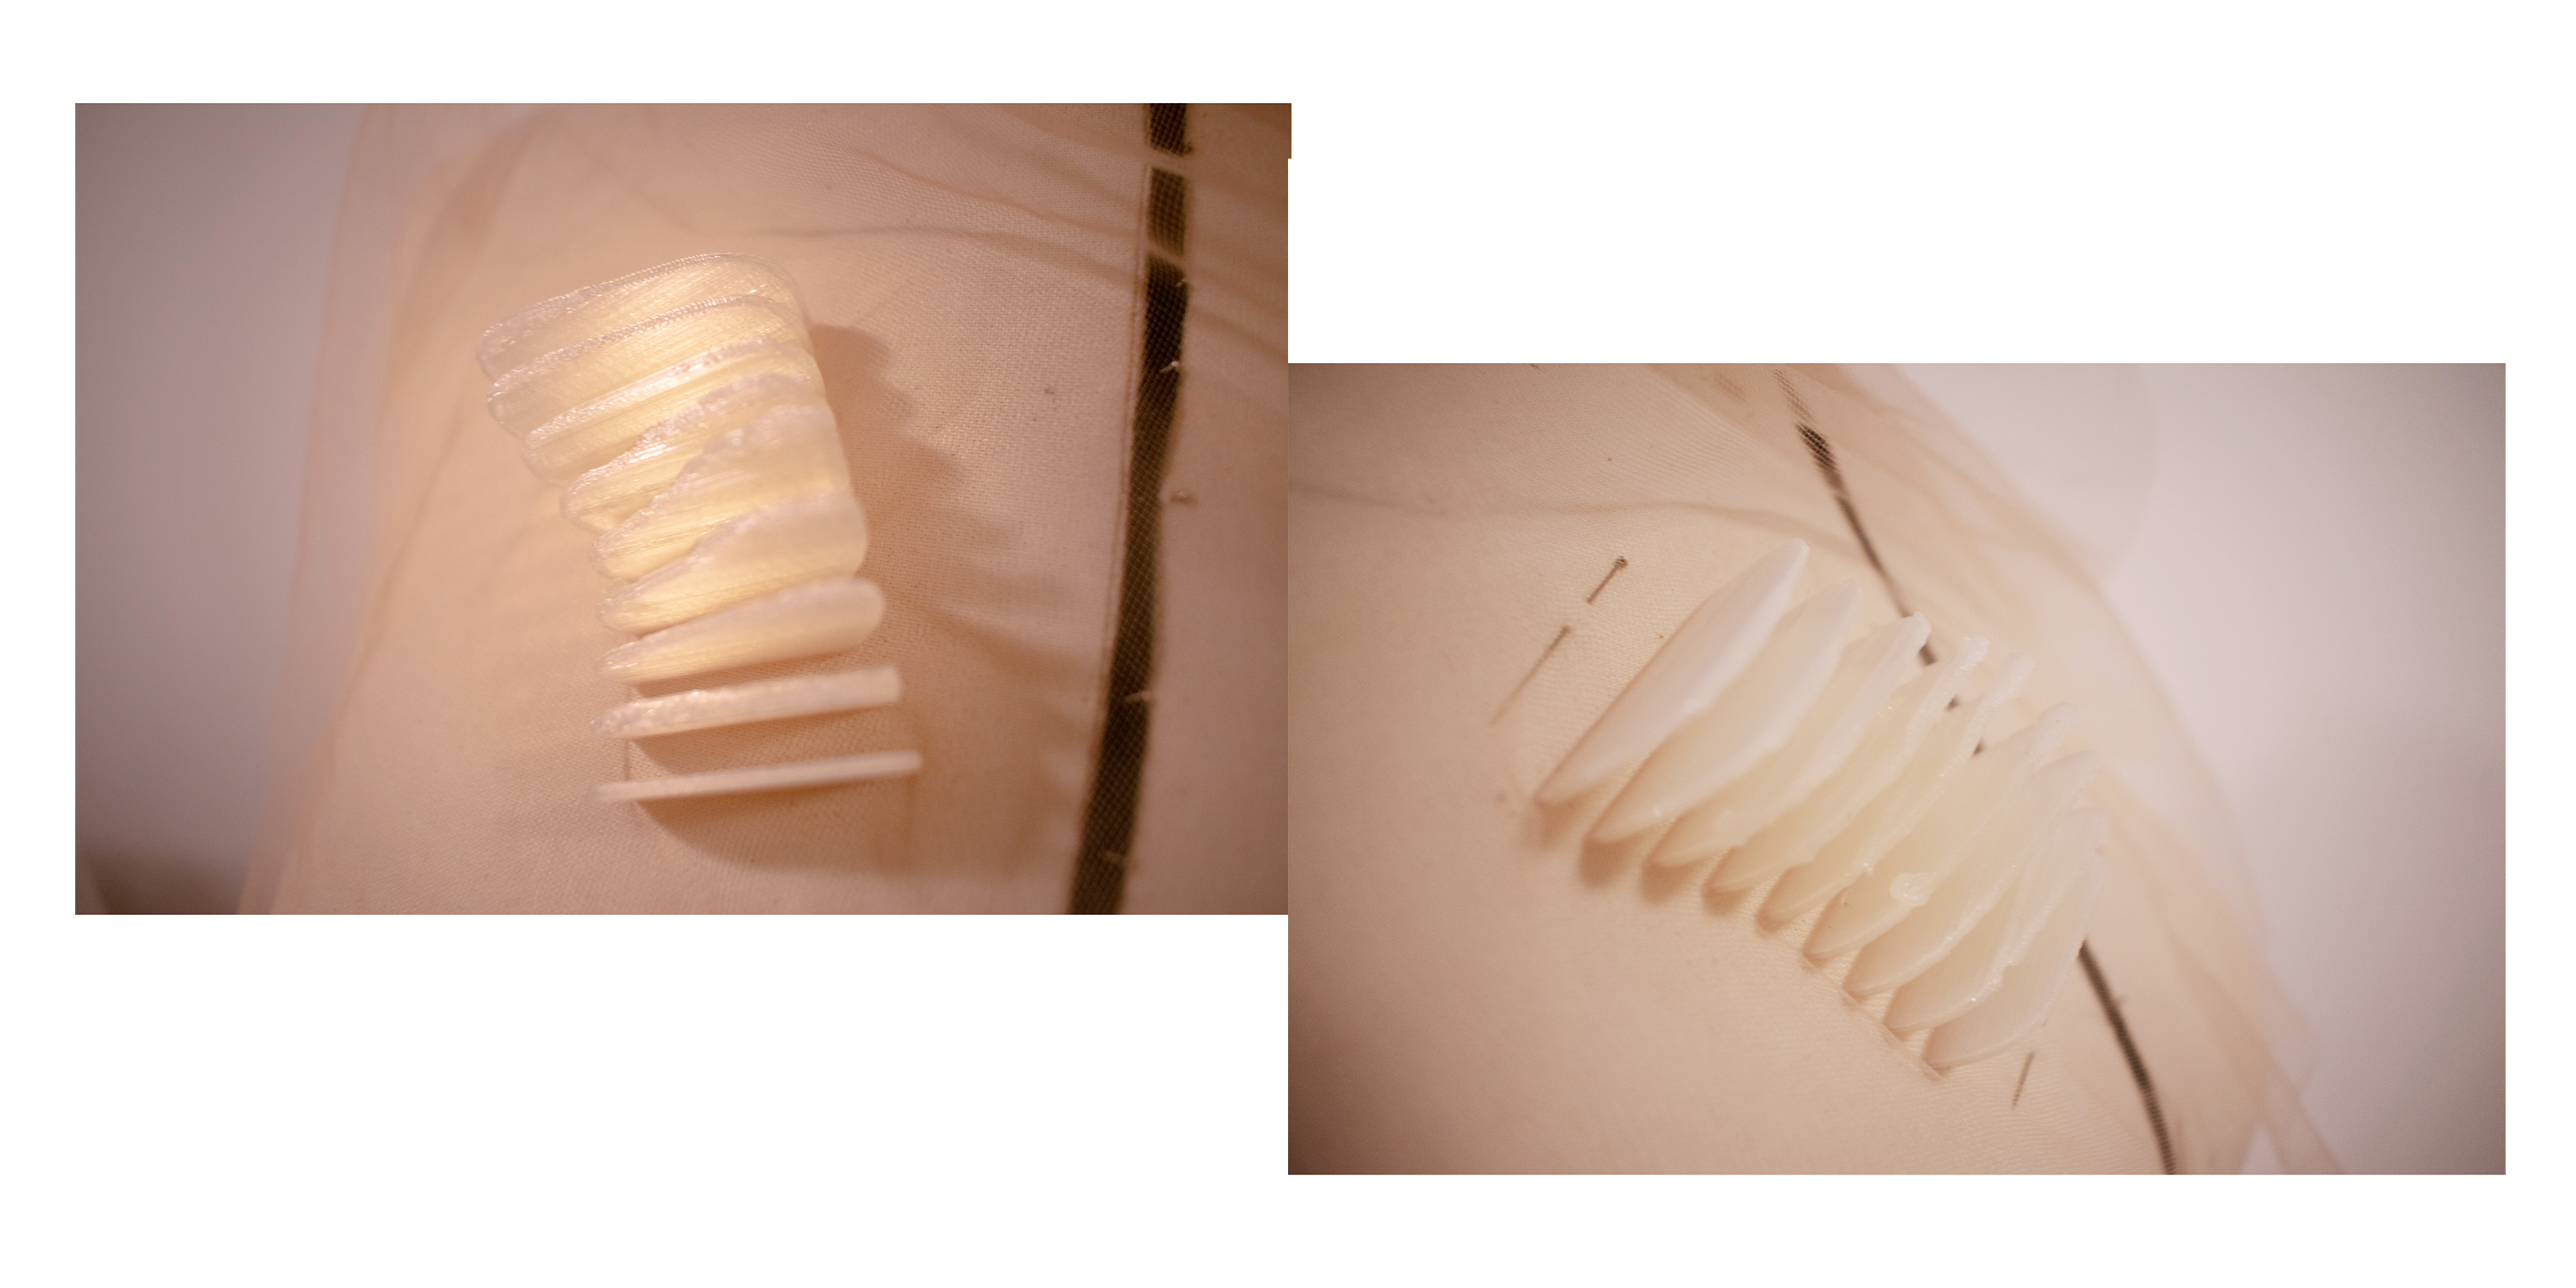
I followed the steps with my design and changed minor parameters to get the result I wanted, and tested it then on the 3D printer. Here are the examples I printed afterwards :


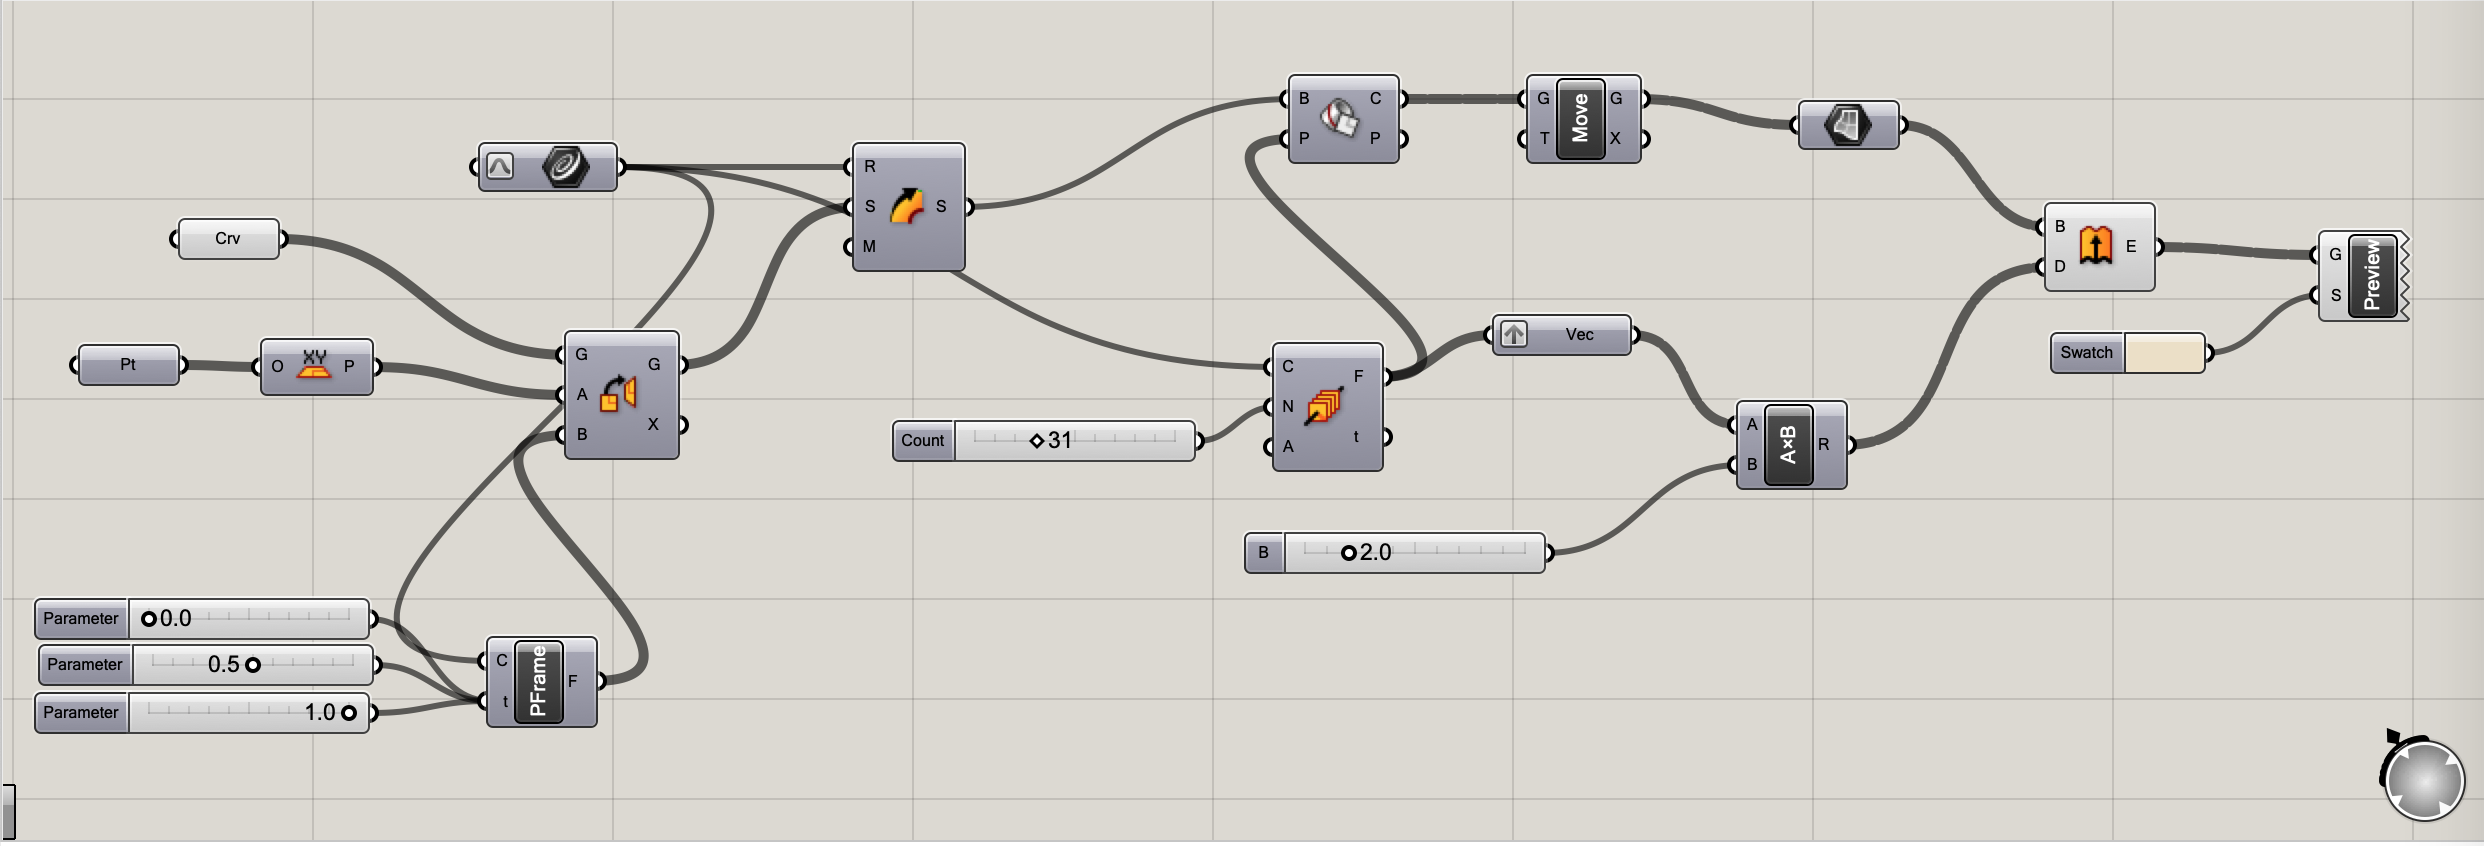
Grasshopper codes for :
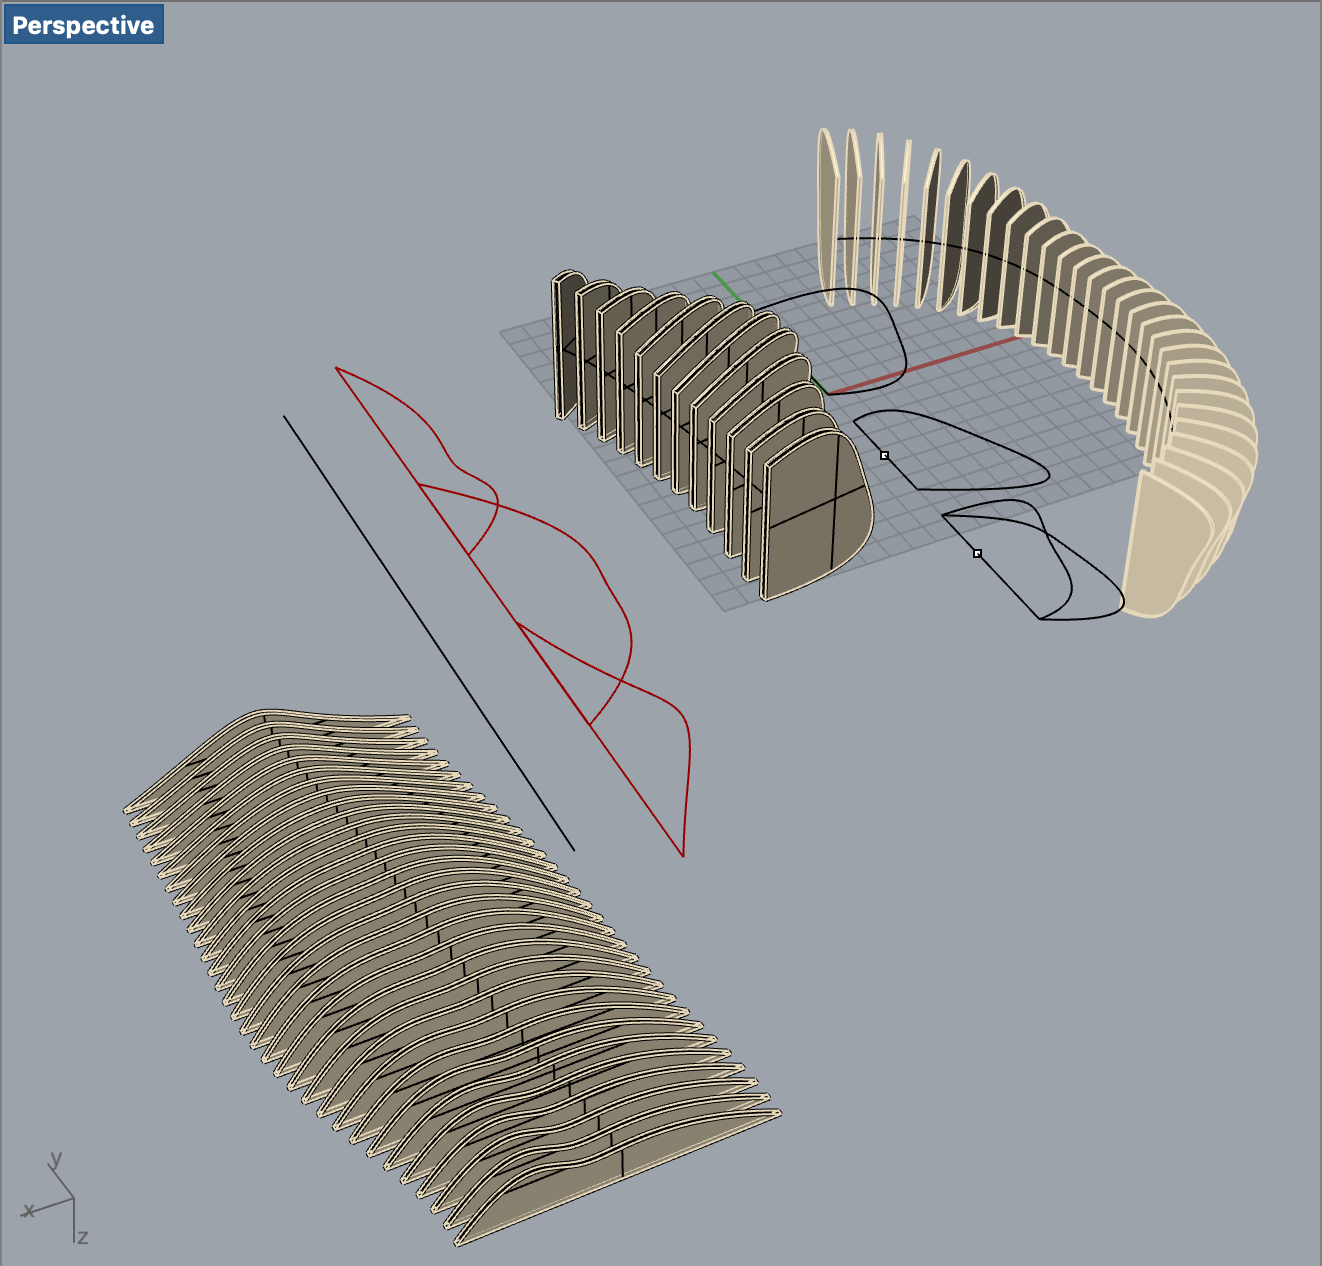
- Long design
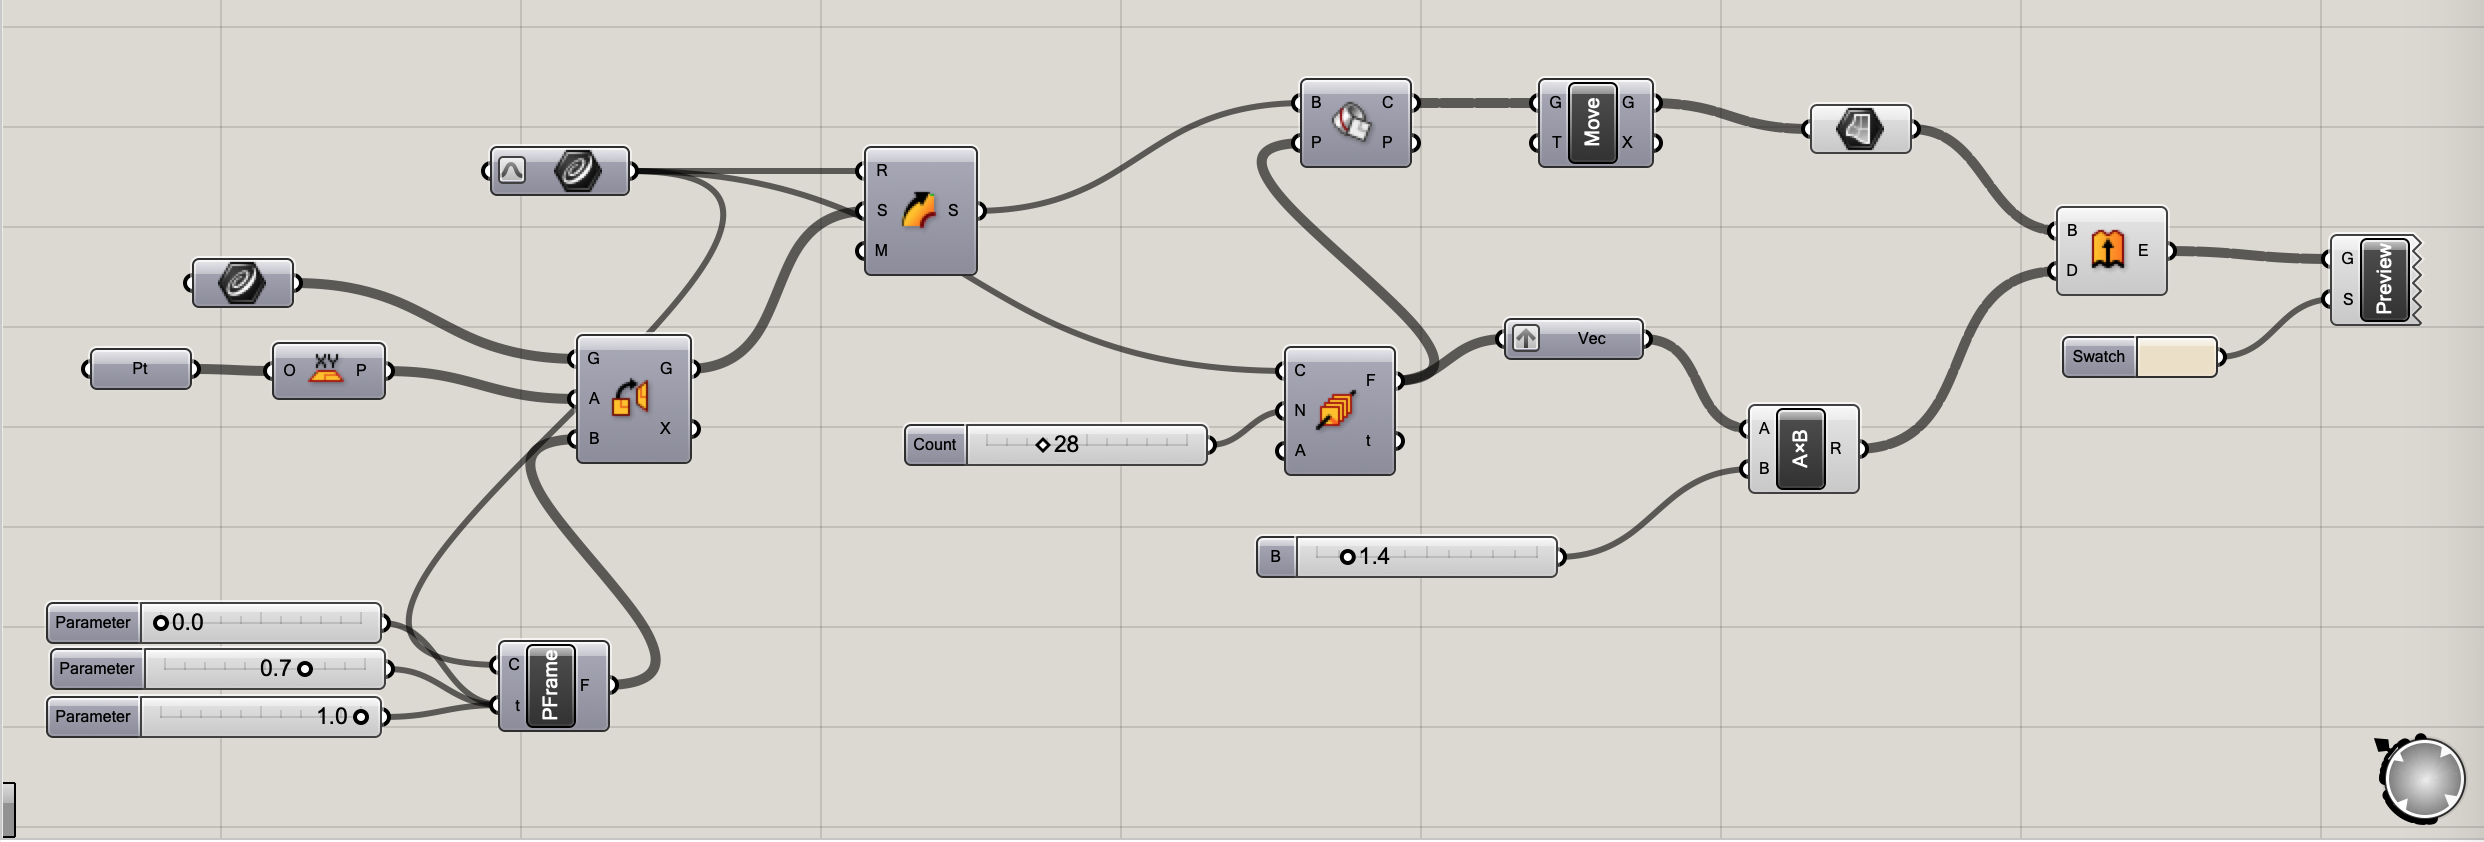
- Short design
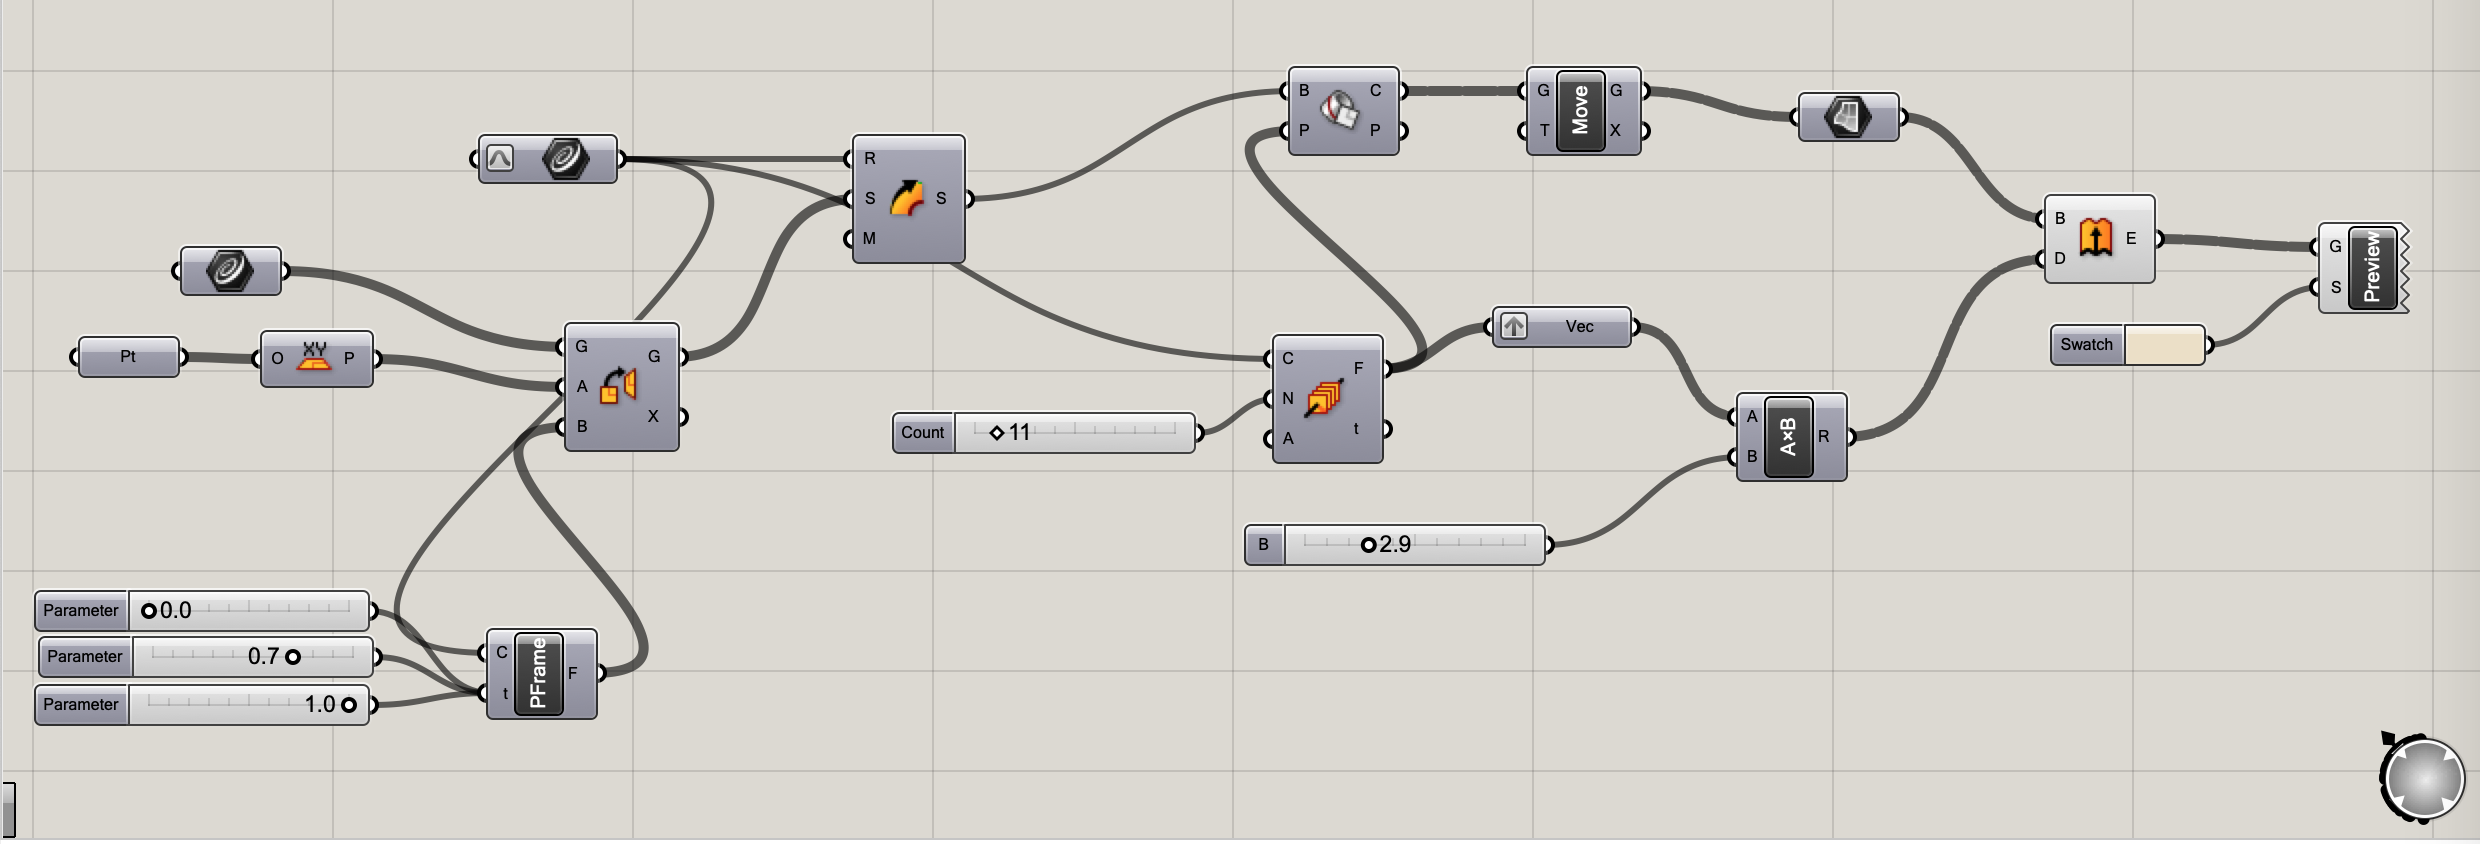
- Flat design
3D printing#
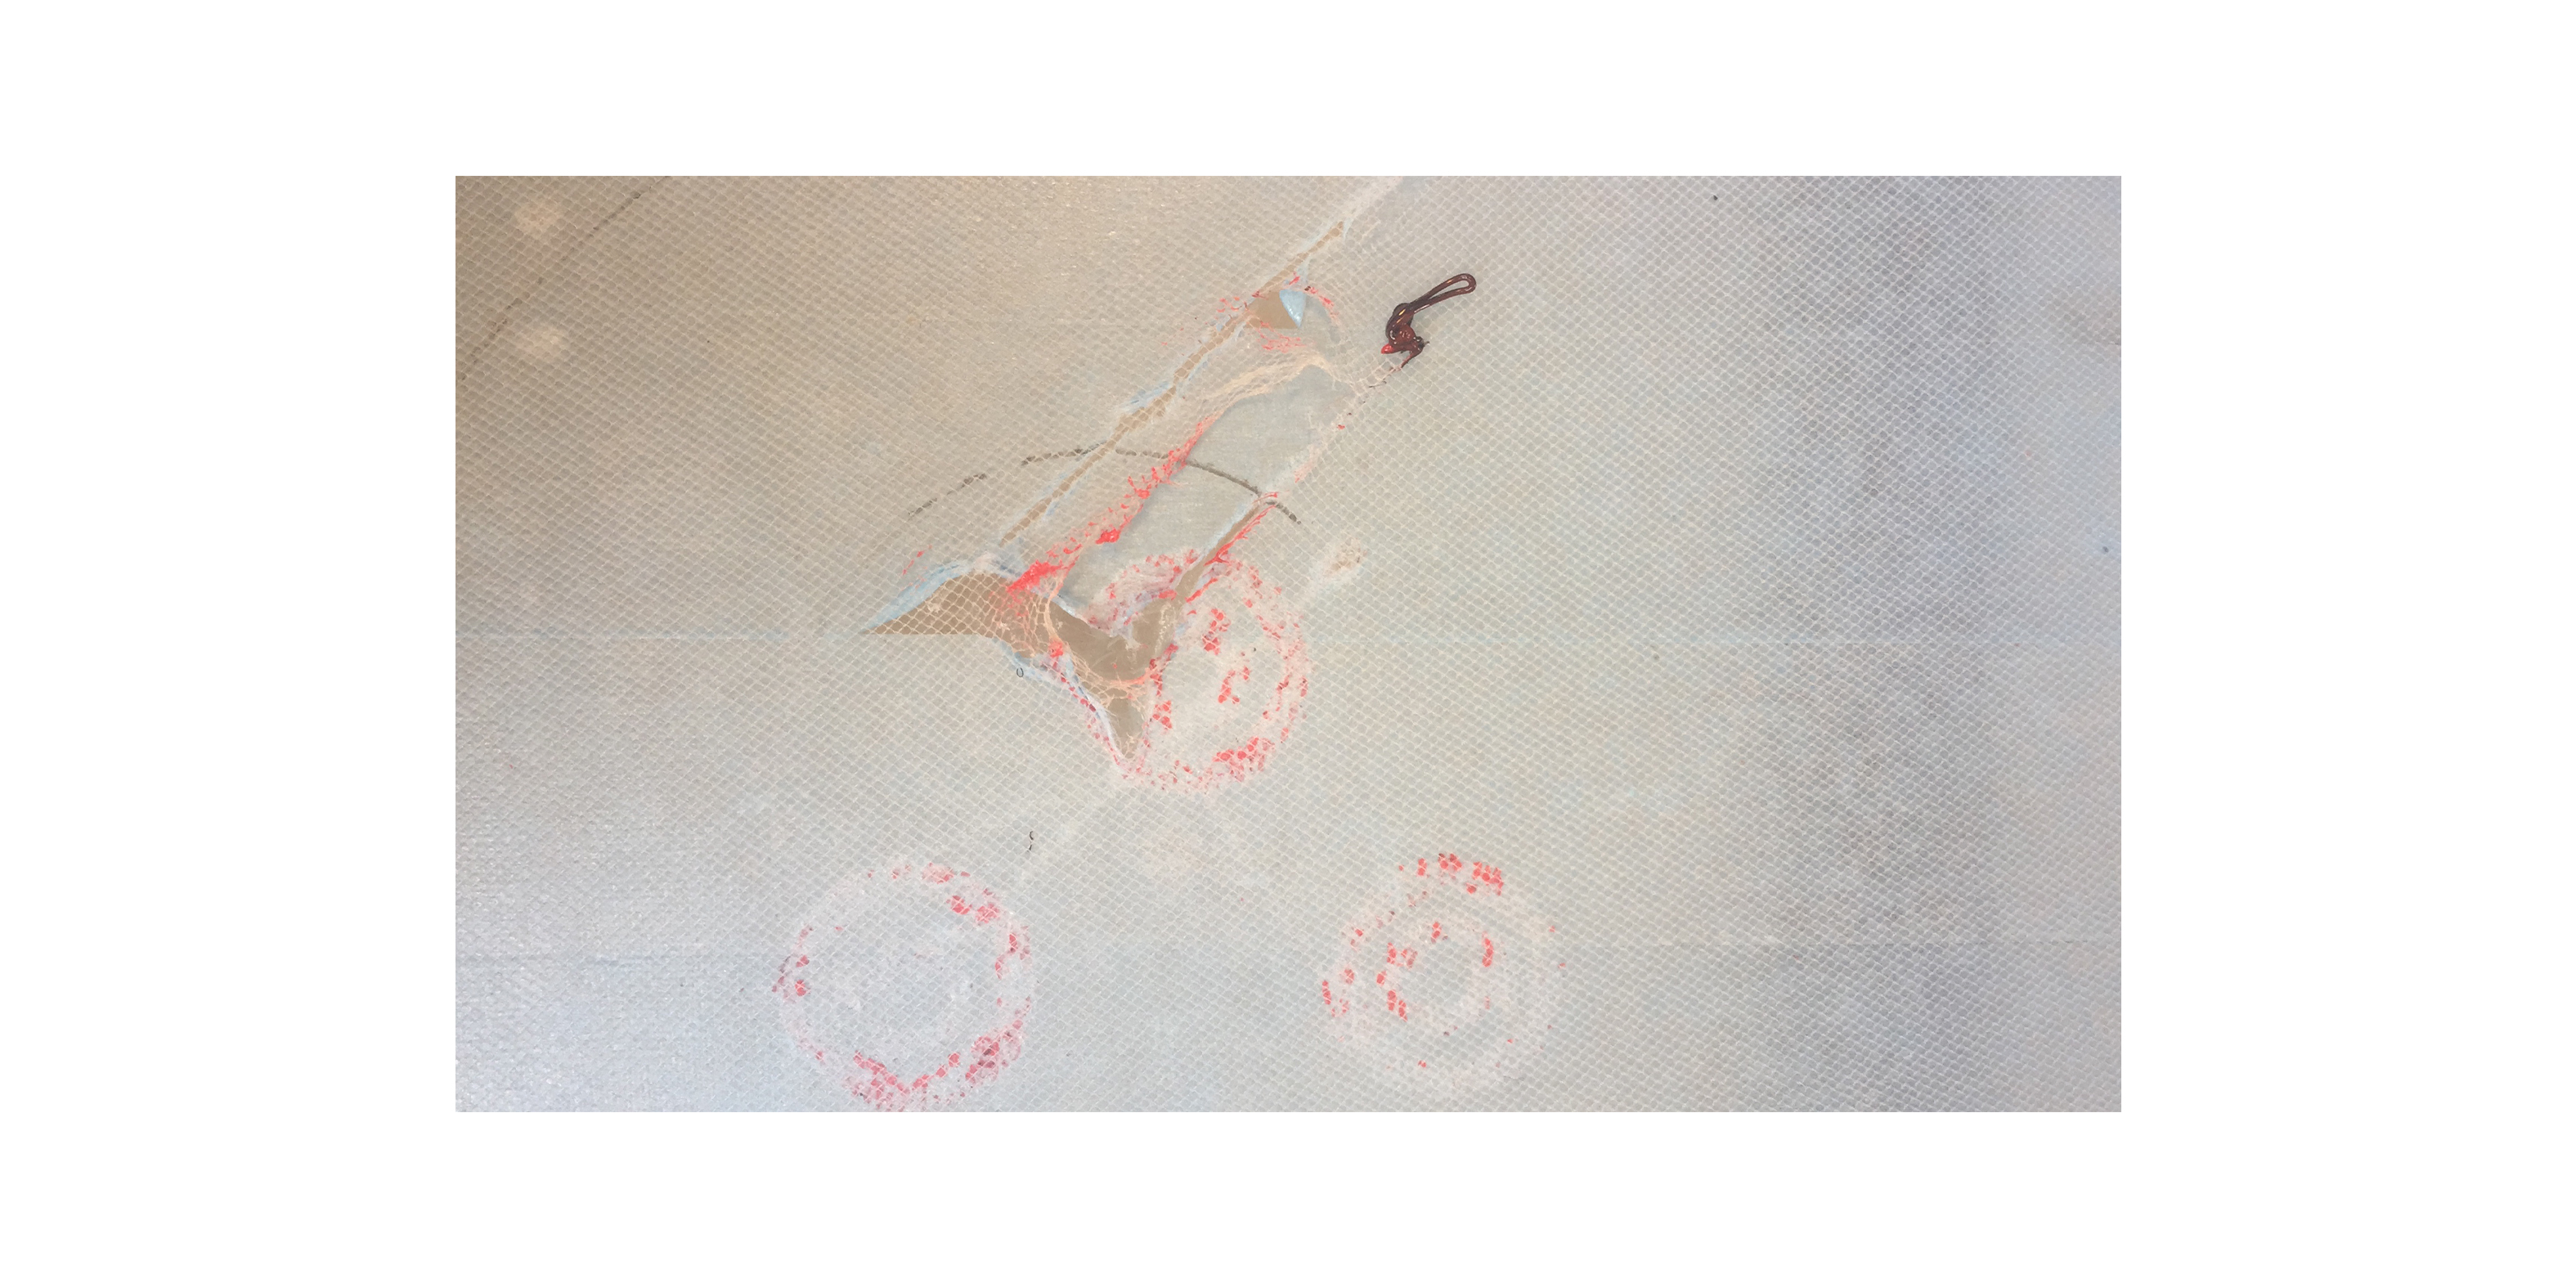
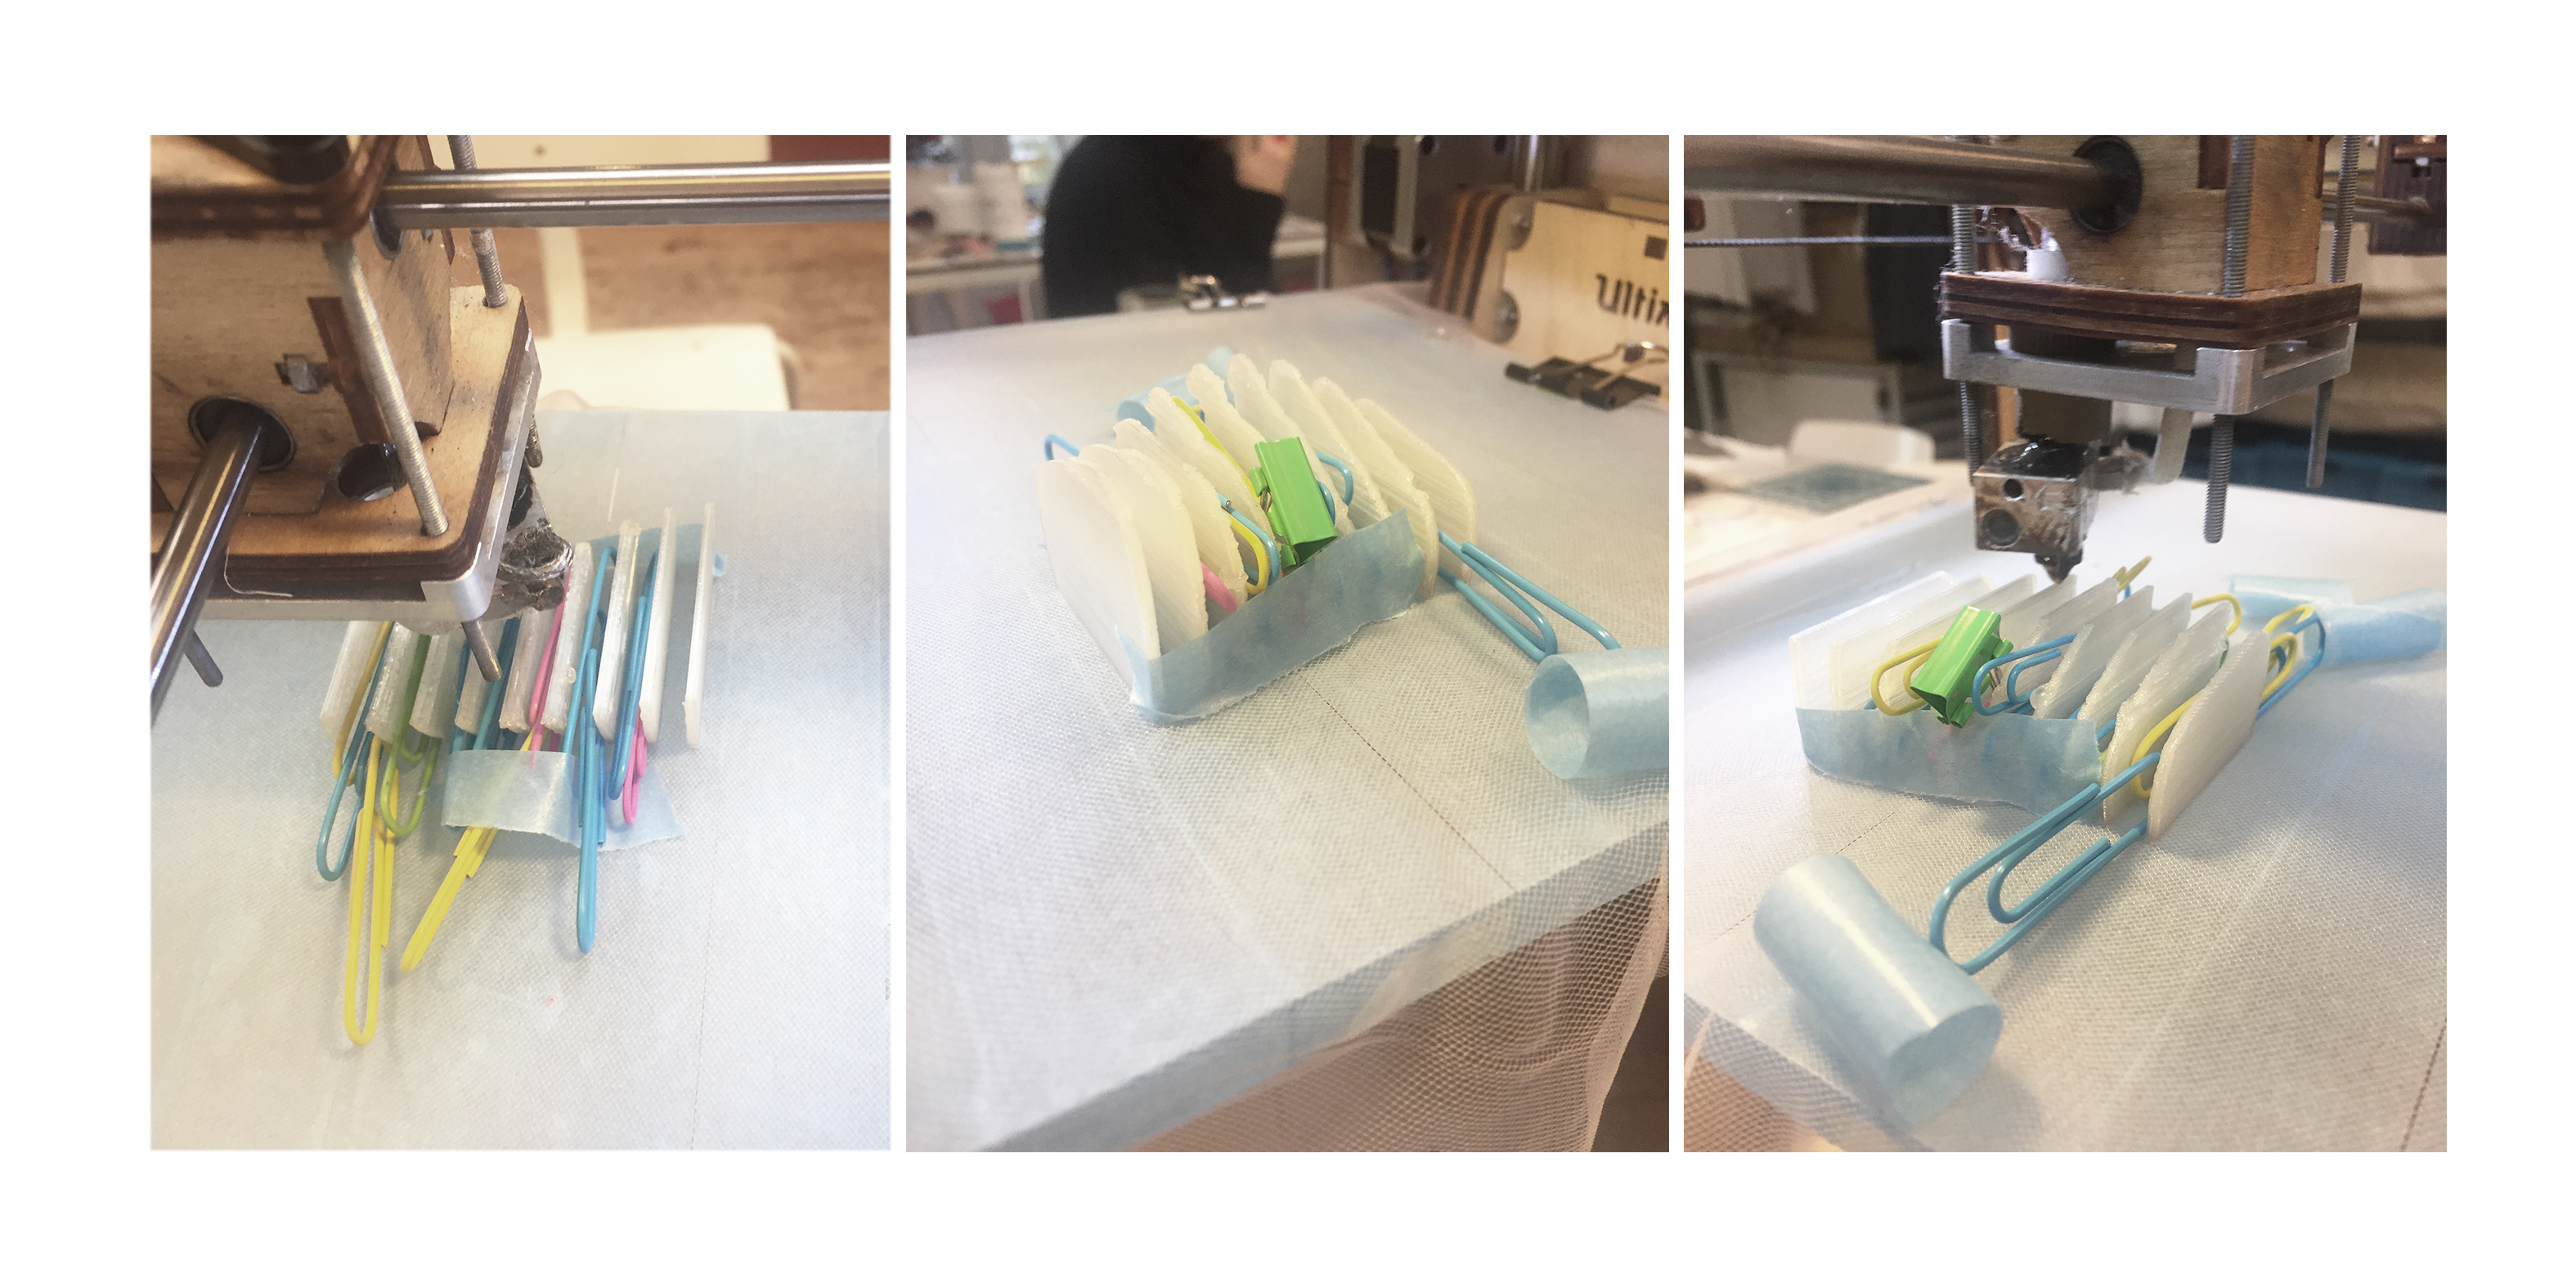
This assignment was my first direct introduction into the 3D printer. For the samples below, I used the Ultimaker Original and took care of the printing settings on Cura. The first test I printed was the ‘short design’, where I encountered a few issues during the printing process. First,I found out that the printer’s bed was well placed. Therefore, thz axe was too up and the nozzle got too close to the fabric ( Tulle ) I wanted to print on. Secondly, I didn’t understand why in the middle of the design the nozzle was printing ‘in the air’, and then Cecilia found out that the design wasn’t fully straight on the bottom.. Also, half through the printing some of the middle ‘slices’ started shaking at each contact with the machine’s nozzle. So I had to make a support structure around the slices…
- Hole in the tulle
- Support structure
- Gills test 1 printed
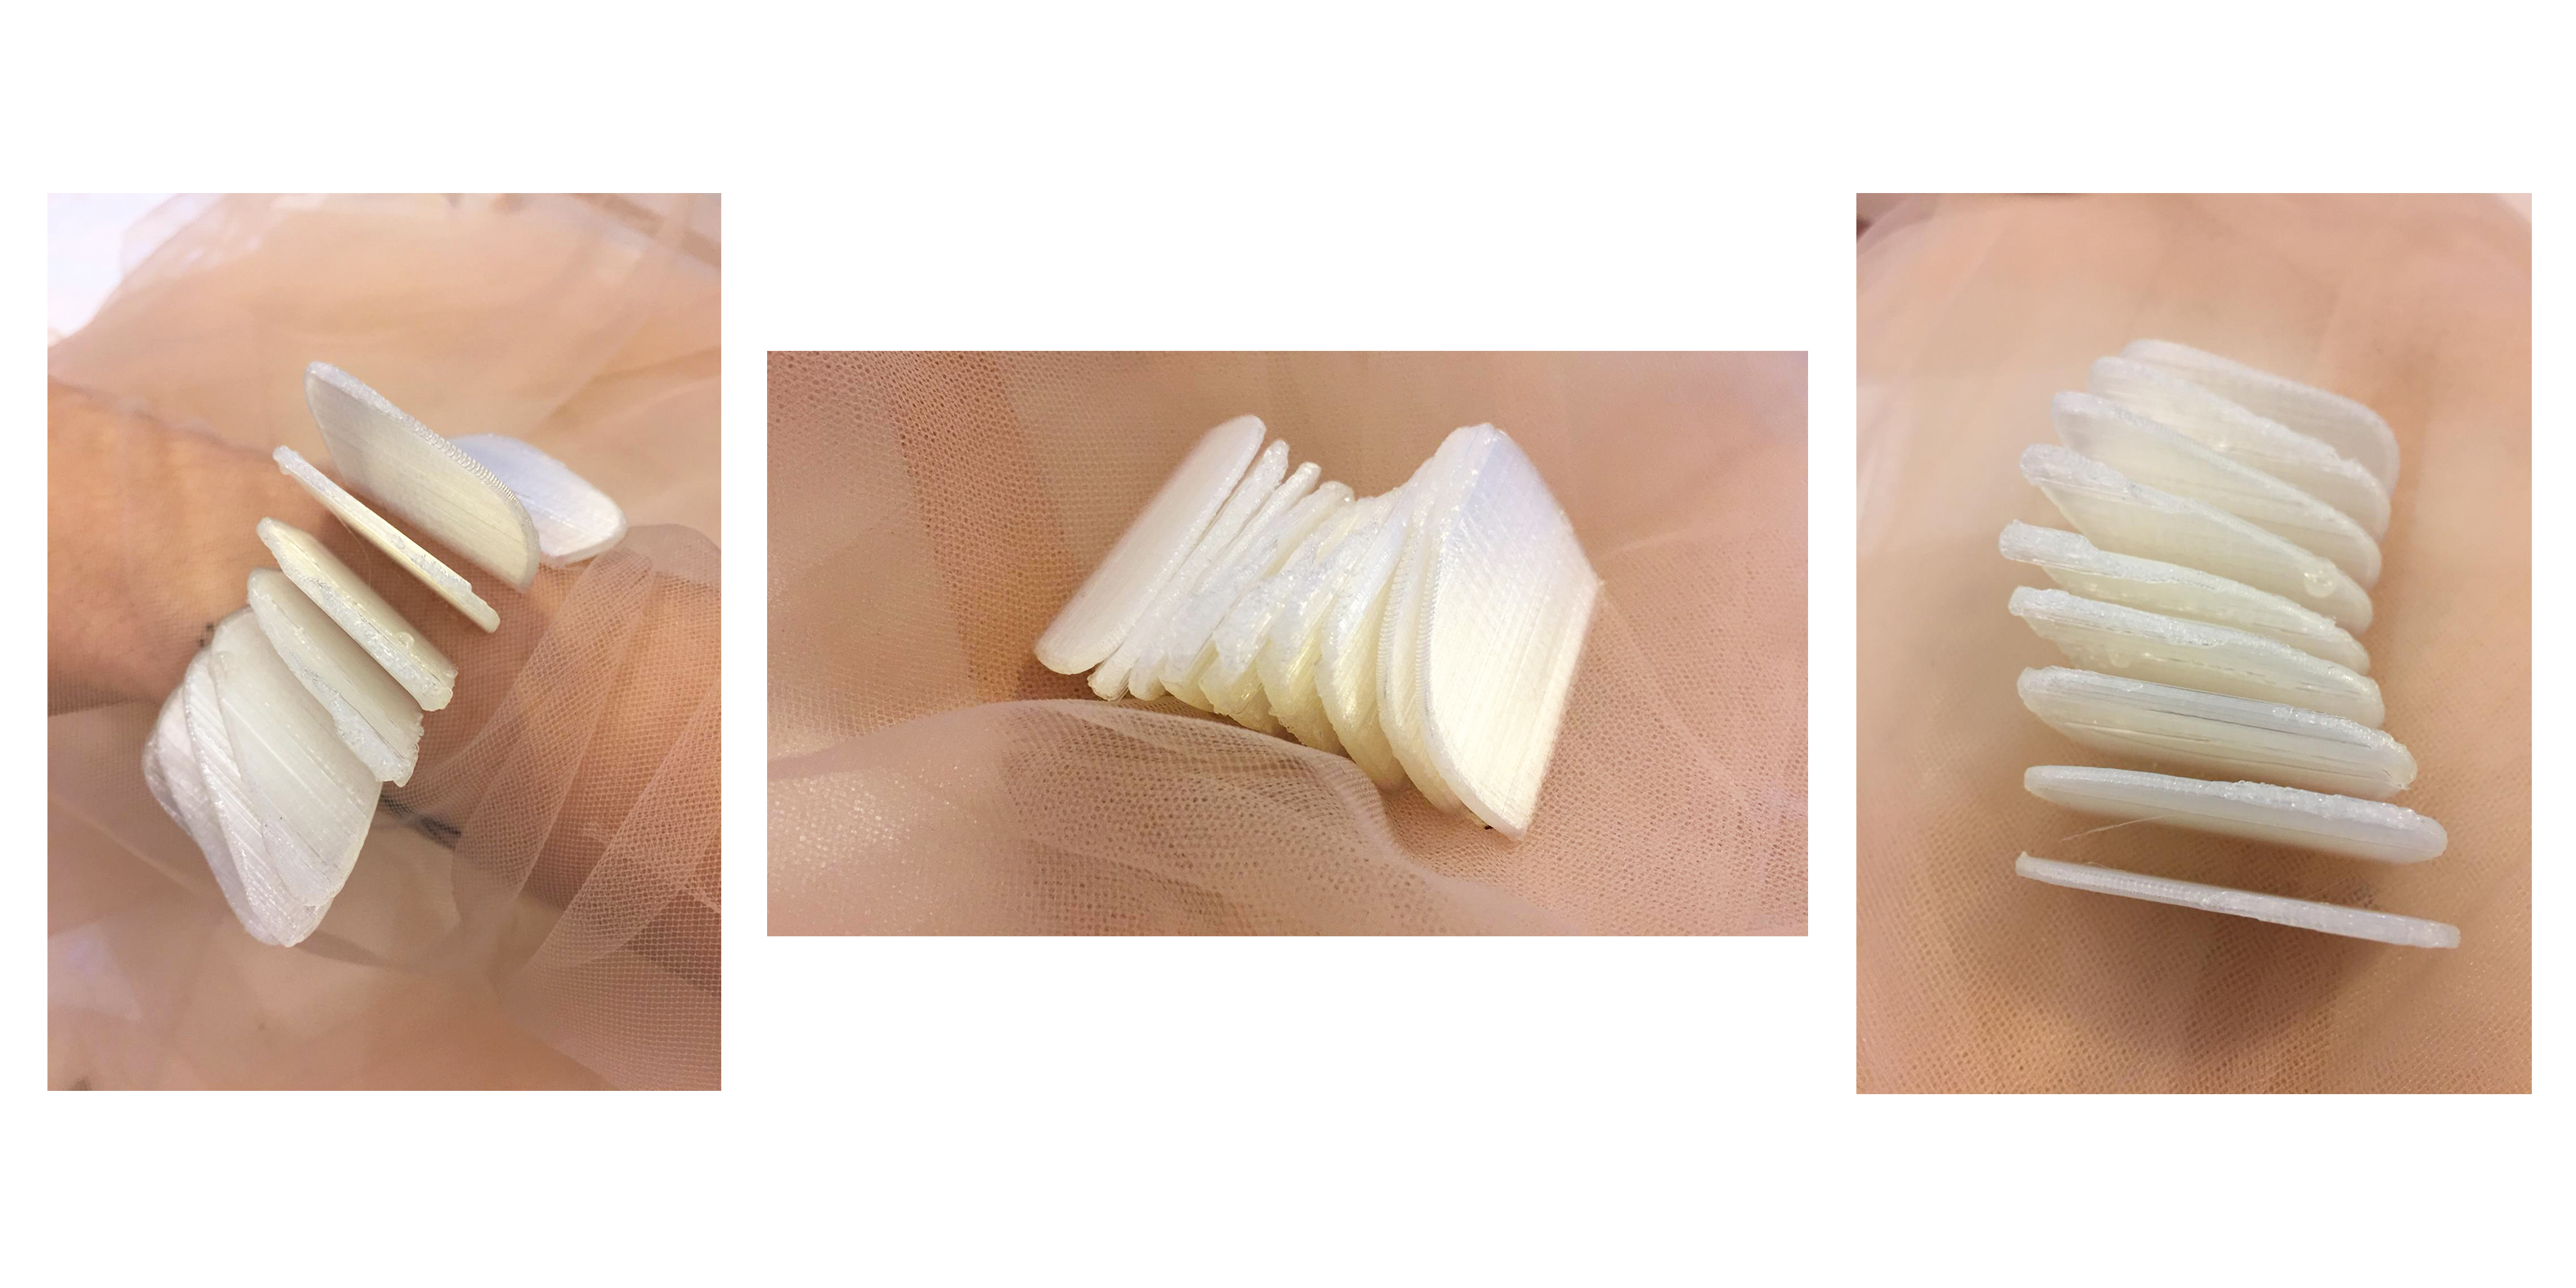
Because of the ‘shaking’ issue I changed the design into a more flat one and I added more slices to it.
- Printing:
Test one :

Test two :

The pieces were printed on the Ultimaker Original:
- Extruder : 200 degrees celsius
- Printing time : 01:46:06
- Speed : 50
- Filament : PLA transparent color